Isometric Game Development in HTML 5 Canvas Part 1
07 Apr 2012Summary
Loads a level that was created in Tiled and have a hero move around using Cocos2D-Javascript.
Thanking
With the help of a few really nice developers on the internet I manage to put their hard work together and came out with this project. They are:
-
Ryan Williams for his Cocos2D-Javascript, port of Cocos2D iOS. At this moment it’s the only Javacsript library I know of that support Tiled’s TMX file format
-
Clint Bellanger for his Free Libre Action Roleplaying Engine. I have to say he is one multi talented developer who also does most the artwork on his own game engine and whole heartedly making all his art work free for public use. Really rare kind. We will be using a lot of his graphic work here - specifically, the TMX file, the tileset and our hero sprite.
-
Thorbjørn Lindeijer for his general purpose tile map editor which is responsible in creating the levels.
Code is hosted in Github. Demo you can access here.
Start
Cocos2D-Javascript requires NodeJS and NPM once you have installed these correctly and Cocos2D-Javascript, we can now proceed starting first on an overview of our graphic assets used in the game.
Graphic Assets
Our Tiled TMX file:
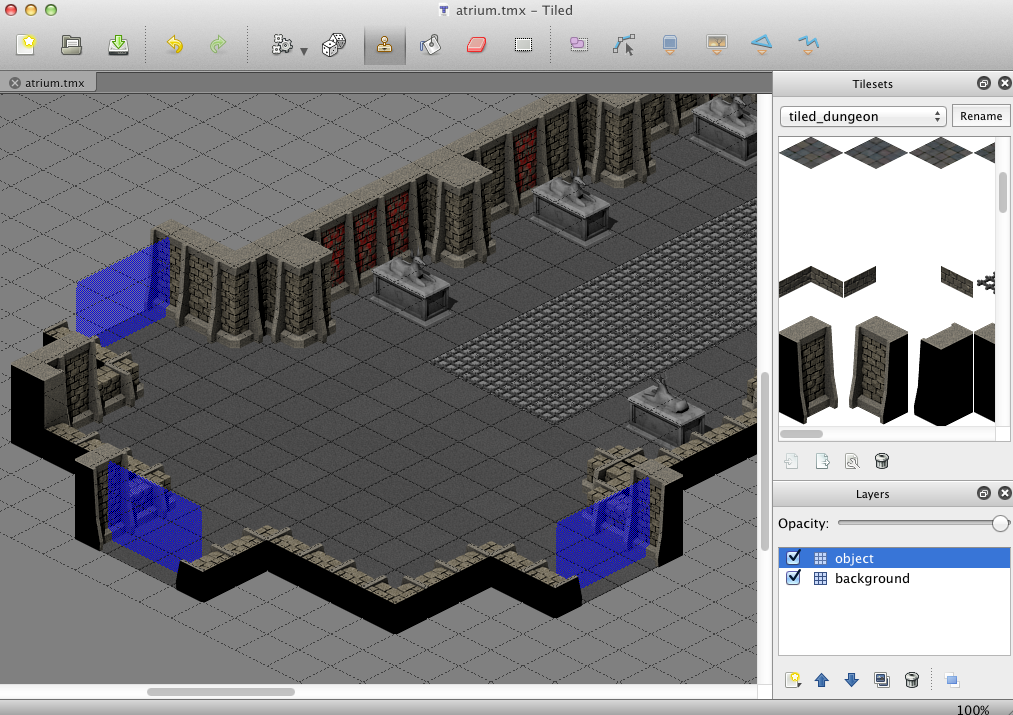
The map will have a total size of 60x60 tiles with each tile having a base size of 64x32.This would give us a total of 3840x1920 pixels for our hero to move around.
It will also have 2 layers - the floor/background layer, and the object/wall layer. Both layer will share one tileset:
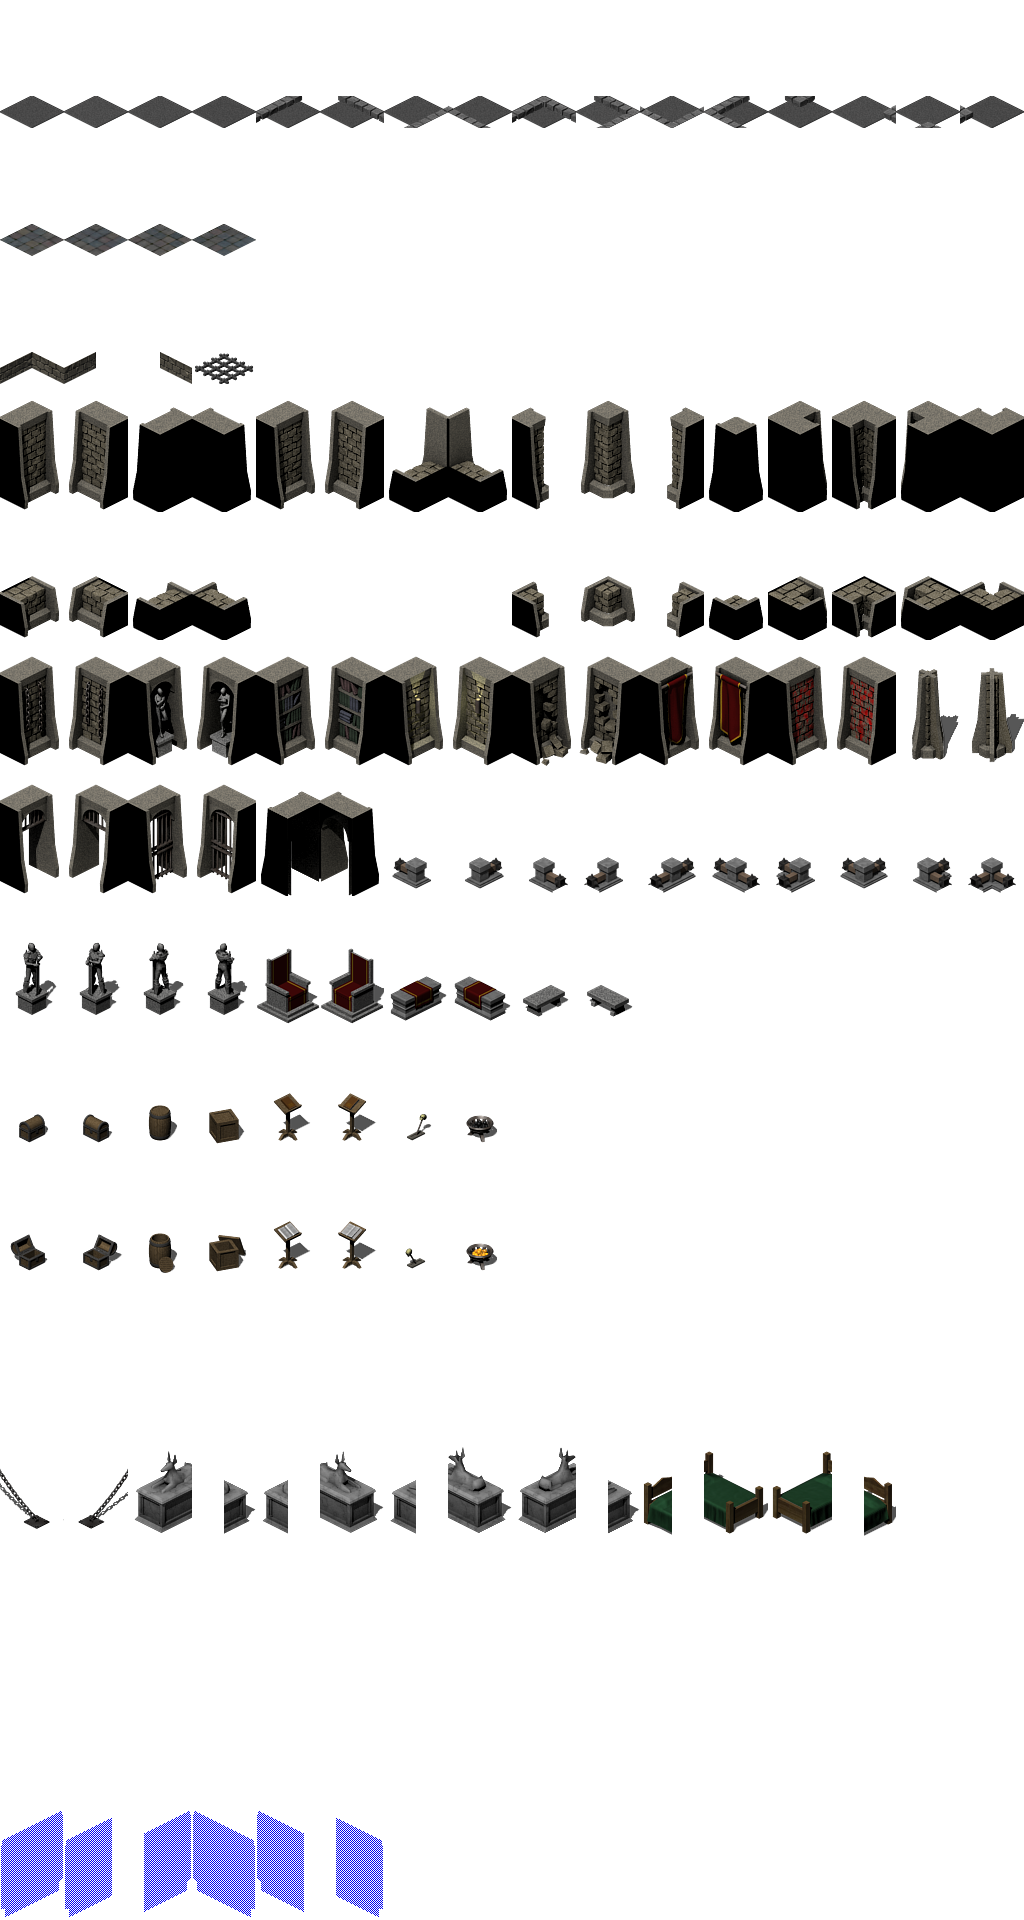
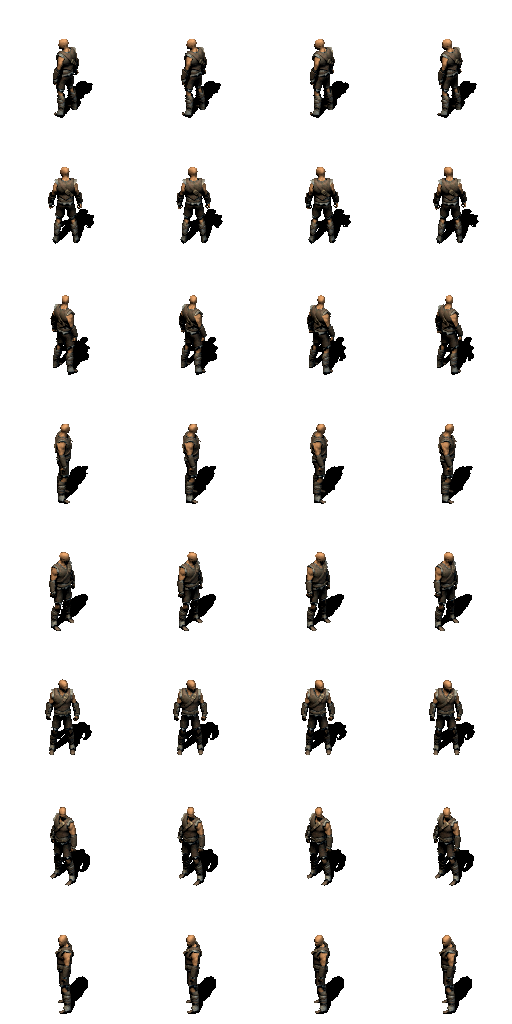
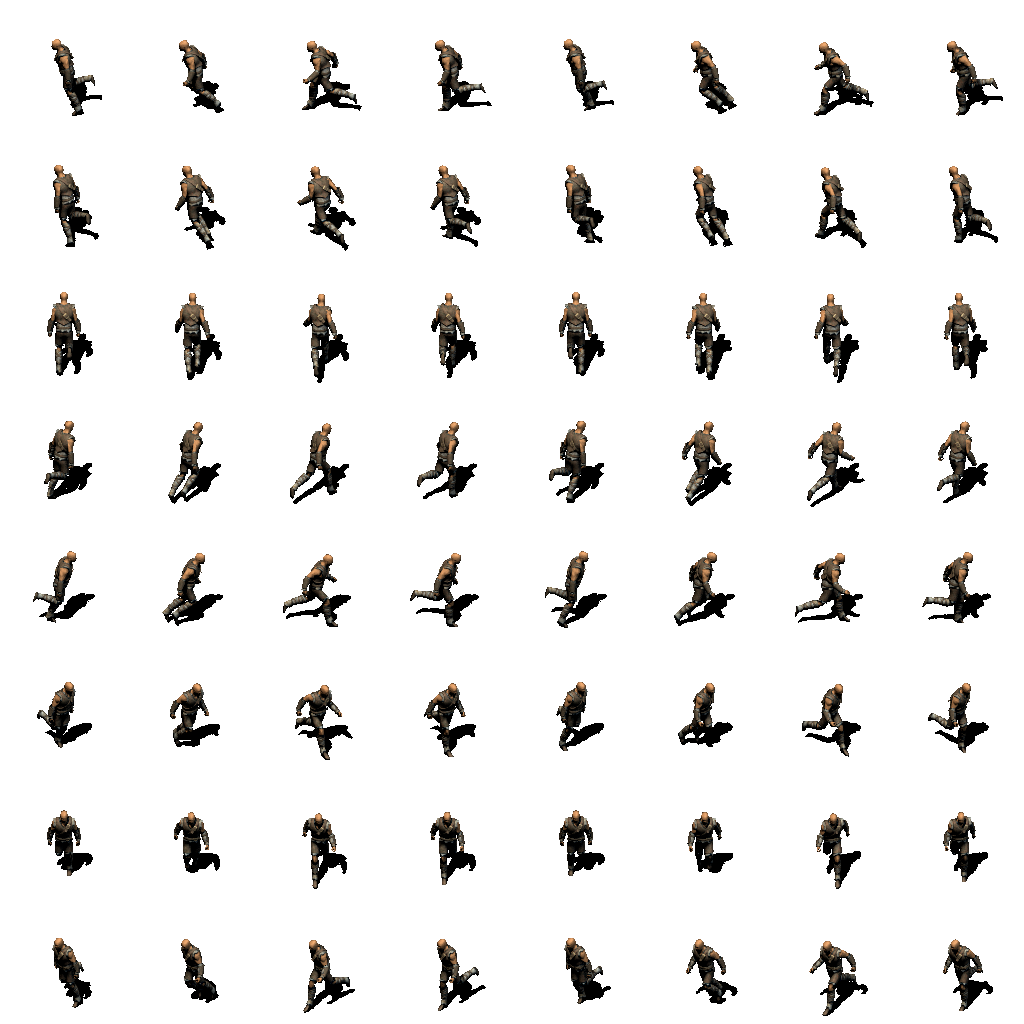
This is our dungeon tileset broken into 64x128. Our hero will have 2 animations with 8 directions each. 1 for idle and 1 for walking. Each animation will be on its own file:
 |
 |
|---|---|
| Idle Animation Frames | Walk Animation Frames |
The idle animation will only have 4 frames but when we reach the last frame we will play it in reverse order. The walk animation will be looped. Each line of the of the animation file will have one direction. Starting from W moving clock-wise to SW.
Loading the map
After you create your project using ‘cocos new <project name>’ create a folder name ‘resources’ inside the ‘/src’ folder. This is where our game data will live. Now open ‘src/main.js’ and right on the top put this shorthand to the TMXTiledMap class:
1
, TMXTiledMap = nodes.TMXTiledMap
On our game’s main constructor, this is where we will do most of our game’s initialization code.
Now we proceed to load the map and center it on our canvas:
1
2
3
4
5
6
7
8
9
10
11
12
13
14
15
16
17
18
19
20
21
22
// Get size of canvas
var s = Director.sharedDirector.winSize
// load our tmx map
tmxMap = new TMXTiledMap({ file: '/resources/atrium.tmx' })
// get dimension properties from our tmx map
var ms = tmxMap.mapSize
, ts = tmxMap.tileSize
, ws = geo.sizeMake(ms.width * ts.width, ms.height * ts.height)
// calculate the center spot for the map
var mapCenterX = -ms.width * ts.width / 2
var mapCenterY = -ms.height * ts.height / 2
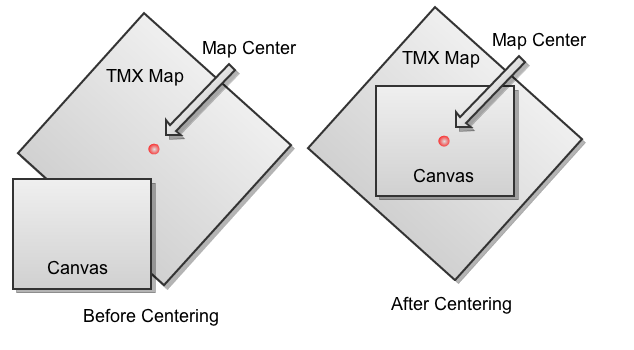
// center our map in our canvas
tmxMap.position = ccp(mapCenterX + s.width / 2, mapCenterY + s.height / 2)
// move it to where we want the area to show first to our player
tmxMap.position.x += 900
tmxMap.position.y += 350
// add the map to our main layer
this.addChild(tmxMap)
Look at visually how this looks like before and after centering our map:
Loading our hero
We will be using a number of classes here to correctly load our hero sprite and animate it while its standing still or walking. In a nutshell it goes like this:
- Load the sprite sheet file into a Texture2D
- Extract the frames out of the texture with SpriteFrame
- Create Animation for each of the direction - that will be 8
- Create a Sprite object, use a single frame from #2 for its initial representation
So that we don’t end up with a big ball of mud, we will create a set of classes to handle our sprite and the animations:
- Entity - base class for entites and objects in a scene, will hold a Sprite object.
- AnimationSet - holds all different animation directions for a single animation type. On our player’s idle animation, this will hold 8 set of animations for the 8 different directions.
- Agent - inherits from Entity, will contains a number of animation sets(eg, idle, walk) and contain other physics properties (eg, speed)
- Player - inherits from Agent, this will be our player controller and will handle the player movement.
1
2
3
4
5
6
7
8
9
10
11
12
13
14
15
// Entity.js
use "strict" // Use strict JavaScript mode
var cocos = require('cocos2d') // Import the cocos2d module
function Entity(opts) {
Entity.superclass.constructor.call(this)
this.position = opts.position
}
Entity.inherit(cocos.nodes.Node, {
sprite : null, // cocos.nodes.Sprite
tmxMap : null // holds a reference to our current tmx map
})
module.exports = Entity
Our Entity class is pretty much bare - at least for now.
Our AnimationSet class will contain these properties:
1
2
3
4
5
6
7
8
9
10
11
12
AnimationSet.inherit(Object, {
texture : null, // cocos.Texture2D
frameWidth : null, // frame width and height from the sprite sheet
frameHeight : null,
numFrames : null, // number of frames in the image sprite
animations : null, // cocos.Animations
animaionIndex : 0, // current running animation
animationDelay : .04,
startingFrame : null, // the starting frame for this sprite
})
In the constructor we will accept 5 properties - the filename to the sprite sheet, the frame width and height, how fast the animation will play, and if we need to rewind the animation while playing. With these properties we will be able to load the sprite sheet, extract all the frames and create a cocos.Animation for all 8 directions.
1
2
3
4
5
6
7
8
9
10
11
12
13
14
15
16
17
18
19
20
21
22
23
24
25
26
27
28
29
30
31
32
33
34
35
36
37
38
39
40
41
42
function AnimationSet(opts) {
// store the properties on this object
this.animationDelay = opts.animationDelay
this.frameWidth = opts.frameWidth
this.frameHeight = opts.frameHeight
// load our sprite sheet file
this.texture = new Texture2D({ file: opts.textureFile })
// calculate the number of frames for each row and column, we will use this to loop through all the frames
var numFramesX = this.texture.size.width / this.frameWidth
var numFramesY = this.texture.size.height / this.frameHeight
// prepare an array to store each frame
var animFrames = new Array()
// loop through all the rows
for(var y = 0; y < numFramesY; y++) {
// loop through all the columns
for(var x = 0; x < numFramesX; x++) {
// using the frameWidth, frameHeight, x and y, we will be able to extract each individual frame from the sprite sheet
animFrames.push(new SpriteFrame({ texture: this.texture, rect: new Rect(this.frameWidth * x, this.frameHeight * y, this.frameWidth, this.frameHeight) }))
}
// if this animation plays backward then we will push the same number of frames again to the array, starting from the last
if(opts.backward) {
var length = animFrames.length
for(var z = 1; z < numFramesX + 1; z++) {
animFrames.push(animFrames[length - z])
}
}
}
this.startingFrame = animFrames[0]
// group all the frames into their own animation
this.animations = new Array()
for(var i = 0; i < 8; i++) {
// the array splice method will remove items from the array and returns it
// in effect, we are returning all the frames for each row on every loop
this.animations.push(new Animation({ frames: animFrames.splice(0, opts.backward ? numFramesX * 2 : numFramesX), delay: this.animationDelay }))
}
}
The Agent class inherits from the Entity class and will create and store 2 animation sets - 1 for idle, and 1 for walking. It is also responsible in creating our sprite object.